D.I.Y: Removing bodywork
Removing bodywork sounds like a simple task but it can frustrate and confuse. Here's how to do it the easy way

Jump to our 12 step guide to stripping bodywork
There are a number of reasons why you might want to strip all your bodywork off. Maybe to replace a damaged panel, give your bike a thorough spring clean or perhaps you're having the bike serviced and want to save labour costs by stripping everything off beforehand.
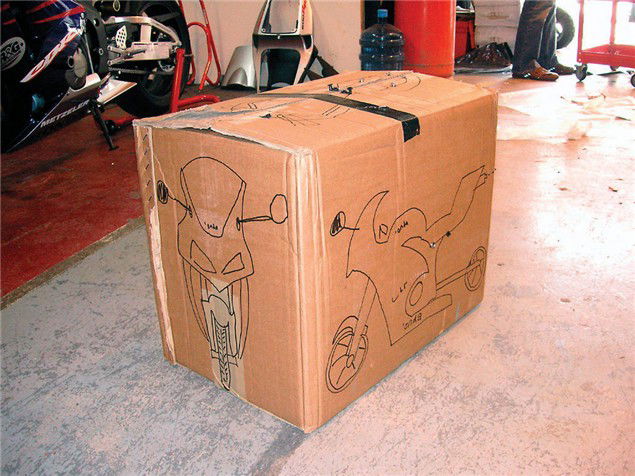
It is essential to have a clear and clean working area, a safe area to store the panels once they have been removed and somewhere the fixings and fasteners can be arranged in order. Tim's idea of sketching an outline of your bike on a box (see right) may sound over the top but it actually works.
Once you have made room for yourself study the way the panels are fitted. As a general rule the first panels to come off are the side fairing panels, but if you're going for a total strip down start at the back and work forward. Start by removing the seat(s). With a sports style split-seat arrangement, the rear seat will normally be released using the ignition key while the rider's seat is be removed by undoing two bolts, found under the rear corners of the seat pad. The rear panels can sometimes be removed in one piece (check for joins at the tail end) or alternatively split left and right. If a grab rail is fitted, this will usually have to come off before the panels.
Once all the fixings have been removed the panels can be lifted away. If there is resistance the chances are you have missed one or two fixings or a push-fit locating lug. Indicator wiring may also need disconnecting.
Next, move forward to the main fairing. The layout of your bike's bodywork will determine how you proceed here. With a CBR600RR, the sidepanels can be removed first, independent of the bellypan. On others, the bellypan may need to come off before the sidepanels, or the sidepanel may be part of the bellypan, separated from the opposite side by a 'V'-shaped piece at the front. Most bellypans split down the middle, so separate the two halves first or carefully remove in one piece (usually possible, but it's easy to scratch the sides on the floor when passed underneath the bike, so be careful).
If there are separate inner trim panels these may need to come off next. In some cases they may need removing before the sidepanels themselves come off, in other cases they stay in place regardless of what else is removed. If you haven't taken them off by now, do so.
The top fairing can usually be removed in one piece. Start by removing the mirrors and screen, then any inner trim panels. Once these are off you will need to have a look at the top fairing's fixing arrangement. In some cases the headlights stay fixed to the fairing, in others they stay on the bike.
As with the other panels remove the obvious fixings first then gently pull at the panel to feel for resistance. Once you're sure everything has been undone, pull the top fairing forward, undoing any connector blocks to the lights and clocks as you go.
Before removing the fuel tank it is advisable to drain as much fuel as possible, unless the 'tank' is merely a dummy cover, as shown here. The fuel tank will almost always be held on by two bolts at the front and either a single bolt or hinged pivot bolt at the rear. Undo the front two first, and then lift the tank to detach the fuel lines. If the tank has a fuel tap make sure it's in the 'Off' position before removing the fuel
lines. Most fuel injected machines are fitted with quick release fittings, removed by depressing a metal tab and pulling apart the two lines. Be careful not to damage the rubber 'O'-ring, particularly when refitting. There will also be one or two breather tubes and at least one electrical connector for the fuel gauge. Once these have been detached the rear fixing bolt can be removed and the fuel tank lifted away.
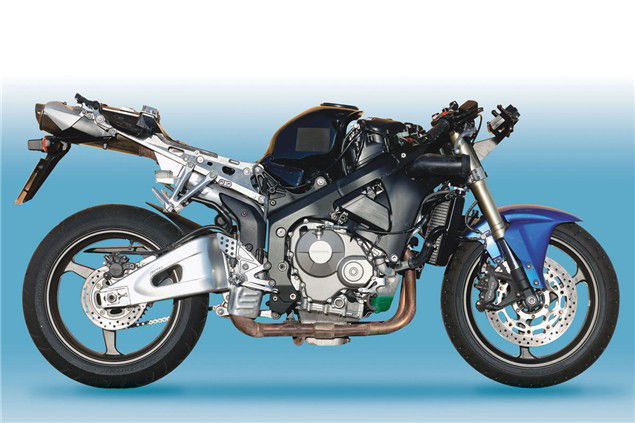
With the bike now completely stripped you are able to properly clean every nook and cranny, carry out necessary maintenance or freshen up your dated 'Skoal Bandit' paint job.
Sponsored By

Britain's No.1 Specialist Tools and Machinery Superstores
When it comes to buying tools and machinery, you need to know you're buying from specialists who know what they're talking about.
Machine Mart eat, sleep and breathe tools and machinery, and are constantly updating their range to give you the very best choice and value for money - all backed by expert advice from their friendly and knowledgeable staff. With superstores nationwide, a dedicated mail order department and a 24 hour website offering quality branded items at fiercely competitive prices, they should be your first choice for quality tools and equipment.


