D.I.Y: Motorcycle cleaning
Tim Dickson, our answer to Kim and Aggie, dons the fluffy gloves to show how to get your bike not nearly really clean, but really clean


Jump to our eight simple steps for cleaning
We'll take it as read you're all familiar with the thankless chore that is cleaning a bike, so we're also going to look at the finer points of getting a salt- and crud-encrusted motorcycle back to as close to showroom shiny as possible.
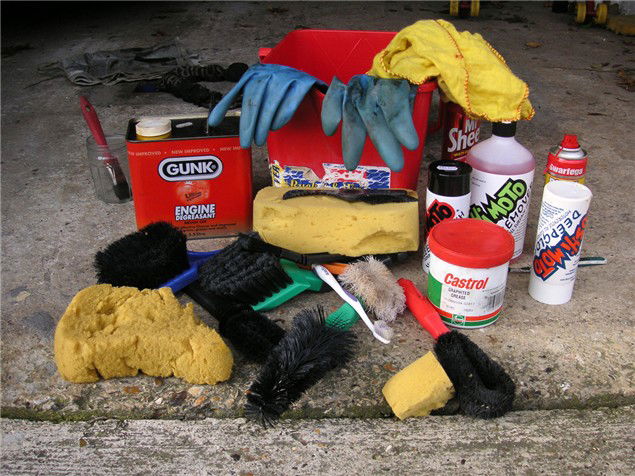
The picture above shows a selection of things that'll come in handy. Muc-Off's bike cleaning brushes can get into most nooks and crannies, but add a washing-up brush, toothbrushes and paintbrushes, and a couple of Halfords car brushes. You'll also want a hose, a bucket or two, sponges, de-greaser, special bike shampoos (don't use washing up liquid), dusters, polish and light oil such as Duck Oil or WD-40. A secret weapons here is Castrol's graphited grease, a heavy-duty, old school grease that can restore the looks of a number of corroded bits and bobs.
But there's no pressure washer. They're best kept away from drive chains, wheel bearings, suspension linkages, oil coolers and radiators and, on the whole, I won't go near a bike with one.
Bear in mind there's only so much you can do if a bike has been left to rot and corrode for too long under a scab of winter detritus. Some of the tricks here can be used to bring life back to surprisingly shite-looking bits of metal and plastic, but if you really want to keep your bike shiny, keep on top of the cleaning regular, like.
First job is to de-crud. Various products do a good job such as Gunk (aerosol or applied by paint brush, but it works - just make sure the bike is bone dry before you start) or Yoshi Moto's De-Gunge-Oprene. For 'heavy soiling' your de-greaser will need to soak in, be re-applied and worked in with an old paintbrush.
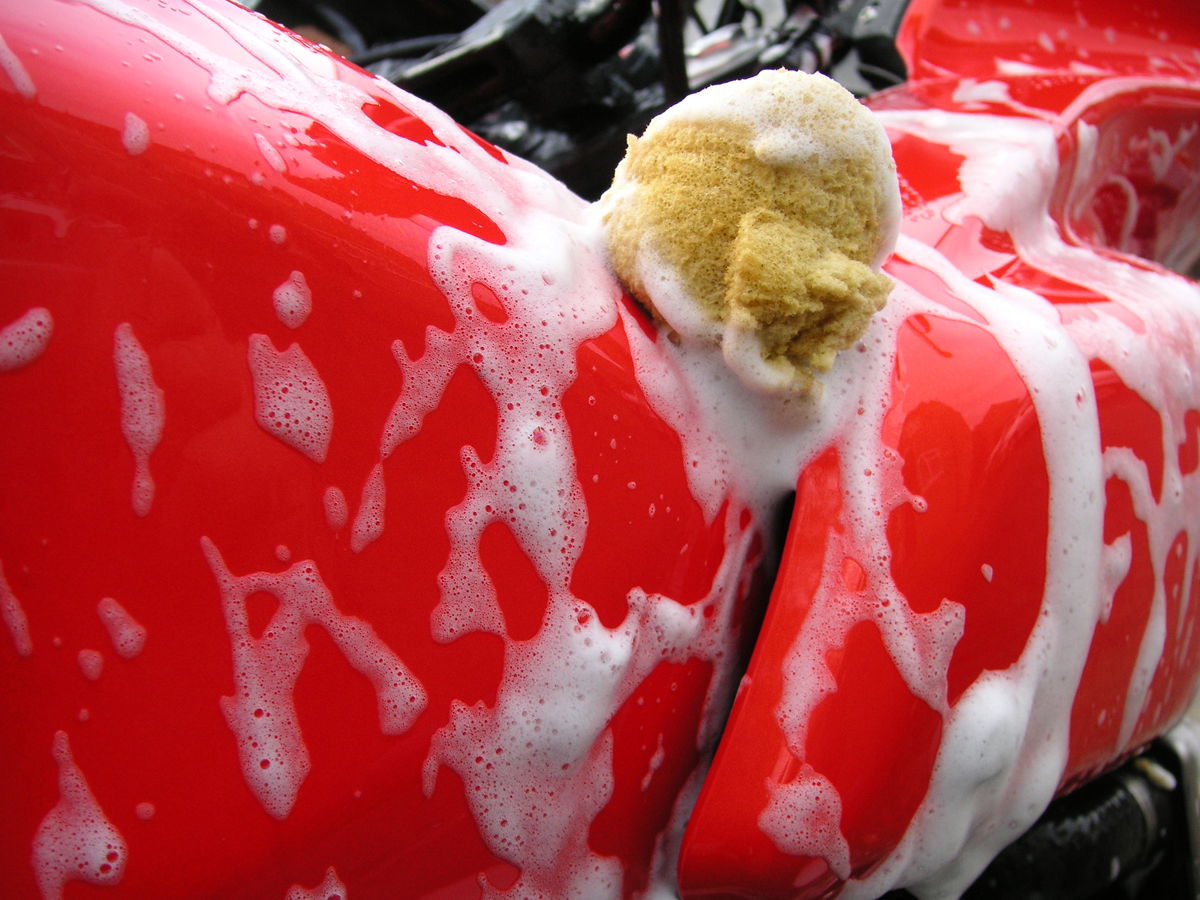
Next, rinse off with a hose - easy, and fun too, but don't squirt your shock linkages, drive chain or wheel hubs too much - then prepare a bucket or two of soapy shampoo. You can go top-to-bottom or front-to-back, but the trick is to clean a small area then rinse, clean then rinse... You get the idea. Use sponges on the bodywork, brushes everywhere else, but soak dirt off the screen gently - a sud-soaked tea towel left on for 10 minutes will remove dirt without scratching. Careful on fairings and sidepanels too; caked-on road cack can be abrasive when first sponged off. For this reason it's best to have one sponge and bucket of suds for bodywork and one for the rest of the bike.
Using a selection of brushes pay close attention to shocks, shock linkages and brake calipers, but be careful not to damage seals. Be aware that dirt may be baked on in places that get hot such as exhaust systems (headers, link pipes and cans) and engines, and may need extra elbow grease - but be careful not to damage the finish.
When all looks clean, rinse again. Dried water marks are the bane of fastidious cleaners, so remove standing water with a chamois leather or blow dry with a leaf blower.
It's only once the bike is dry that you'll see which bits are still dirty and need further attention. Cleaning a bike properly may even take a couple of days - wash it Saturday, dry overnight, finish off Sunday. It's now you'll have to get busy with smaller brushes, the Duck Oil/WD-40 and Mr Sheen. Bikes are a bugger to clean compared to cars because virtually everything can be seen from some angle or other. Again, work front to back, left to right or top to bottom as takes your fancy. Pay attention to, well, everything really. Clean a bike a few times and you soon learn where its dirt traps are and which bits make a real difference to the overall look once cleaned.
With the wheels free to turn (i.e. on a centre stand or paddock stands), polish each one with Mr Sheen - spray the polish onto the duster, not the rim, to ensure none goes on the brakes. Mr Sheen does a superb job of removing even the most caked-on chain lube. Unpainted wheels may benefit from special wheel and/or metal cleaning products.
Many Japanese bikes come festooned with fixtures and fittings made from a cheap, green-ish coloured metal that looks okay when new but soon corrodes. It can often be brought back to life by scrubbing corrosion off with a toothbrush and WD-40, then coating lightly in Castrol's graphited grease. Fairing brackets, oil cooler and radiator fittings, mirror bolts, wheel spindles and nuts, brake line fittings, all sorts can be restored in this way.
Drive chains too. Remove surface rust on the sideplates with a petrol-soaked rag and/or toothbrush, then coat the sideplates with graphited grease - it won't come off, because it's designed for lubing big old chains, and it will help prevent further surface corrosion. The outer face of the chain is easy to do; the one facing the wheel takes a bit more time...
If you really want to get your bike showroom shiny pay attention to the hard-to-reach places around the back of the engine, under the rear mudguard/undertray, the backs of pillion footrest hangers and around the swingarm pivot between the frame rails. Next go over the whole bike with a duster or two and a can of Mr Sheen, cleaning cables, switchgear, clocks, grab rails, indicators - everything, basically - for a proper top-to-toe clean.
For a lasting, protective shine treat the bodywork to a coat of polish, such as Yoshi Moto's Deep Gloss. It may seem like a thankless task when your bike's going to get filthy again within five miles, but it will make cleaning easier next time.
Finally, lubricate any moving parts that may have had their grease or oil washed out - footrest and lever pivots, seat locks, ignition switch, switchgear, cables and the sidestand pivot will all end up stiff and clunky if you don't. Remember too that some de-greasers and bike/car cleaning shampoos can leave a slippery residue on tyres and brakes. Go easy for the first few miles.
Sponsored By

Britain's No.1 Specialist Tools and Machinery Superstores
When it comes to buying tools and machinery, you need to know you're buying from specialists who know what they're talking about.
Machine Mart eat, sleep and breathe tools and machinery, and are constantly updating their range to give you the very best choice and value for money - all backed by expert advice from their friendly and knowledgeable staff. With superstores nationwide, a dedicated mail order department and a 24 hour website offering quality branded items at fiercely competitive prices, they should be your first choice for quality tools and equipment.

