Motorcycle geometry explained
Motorcycle geometry is a complicated subject. If you don’t know your rake from your trail – read on!
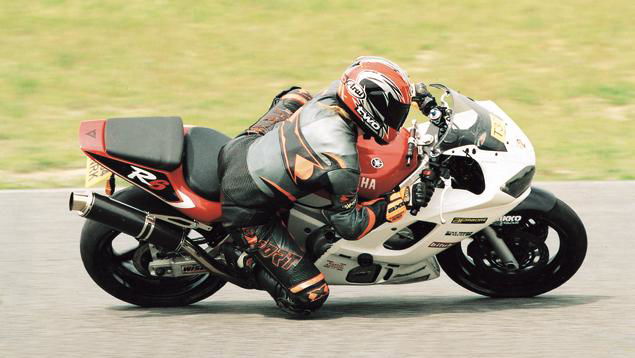
WITH just two wheels and two sets of suspension, a motorcycle’s geometry is far less complex than that of a car. But the lack of wheels means any adjustment you do make can have a big effect on the way the bike handles.
Motorcycle geometry covers two areas of the bike, front end geometry and rear end geometry. For now, this article will focus solely on the front-end geometry of the motorcycle.
This will explain three parts: Rake, Trail and Offset.
What is motorcycle rake?
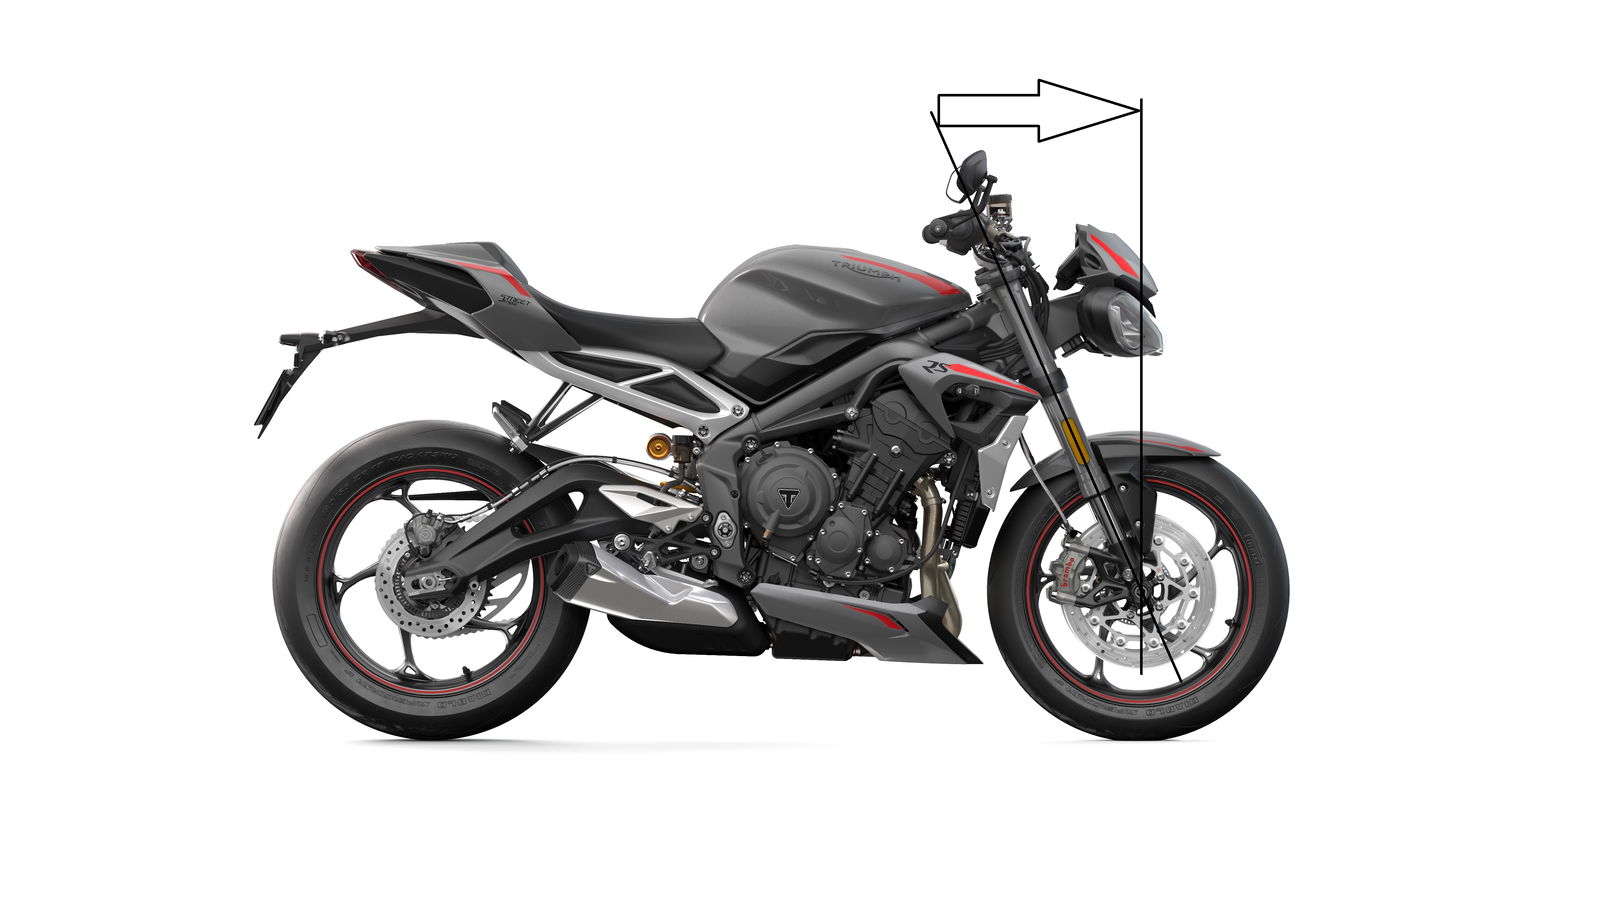
Rake is the angle of the bike’s steering head, sometimes referred to as caster. It is calculated in degrees and measured as the angle between that of the steering head and the front axle if a line is drawn through the centre line of both – and followed vertically upwards in the case of the axle.
In the picture above, the rake angle is clearly marked by the arrow at the top of the picture.
What is motorcycle trail?
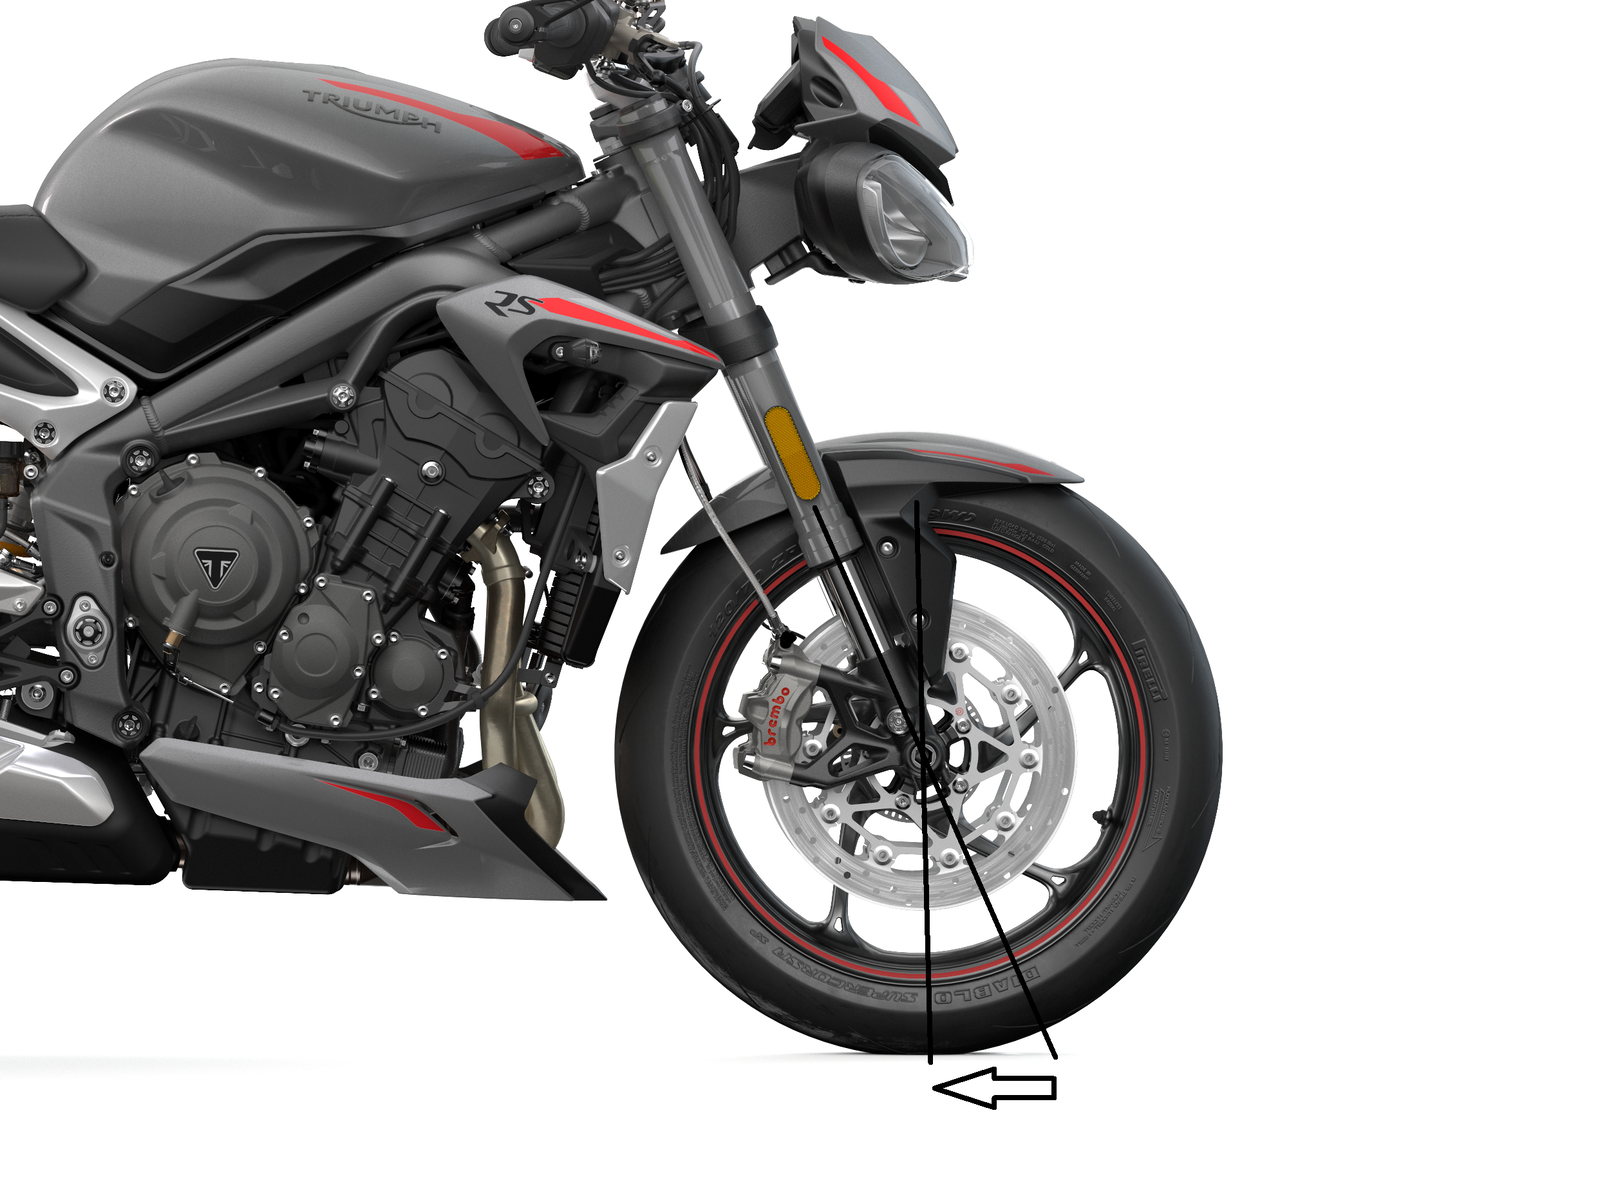
Trail is measured by drawing a horizontal line along the ground at the bottom of the lines in the image above. Trail is measured in MM, for example; the trail for the 2020 Triumph Street Triple RS is 100mm.
What is motorcycle offset?
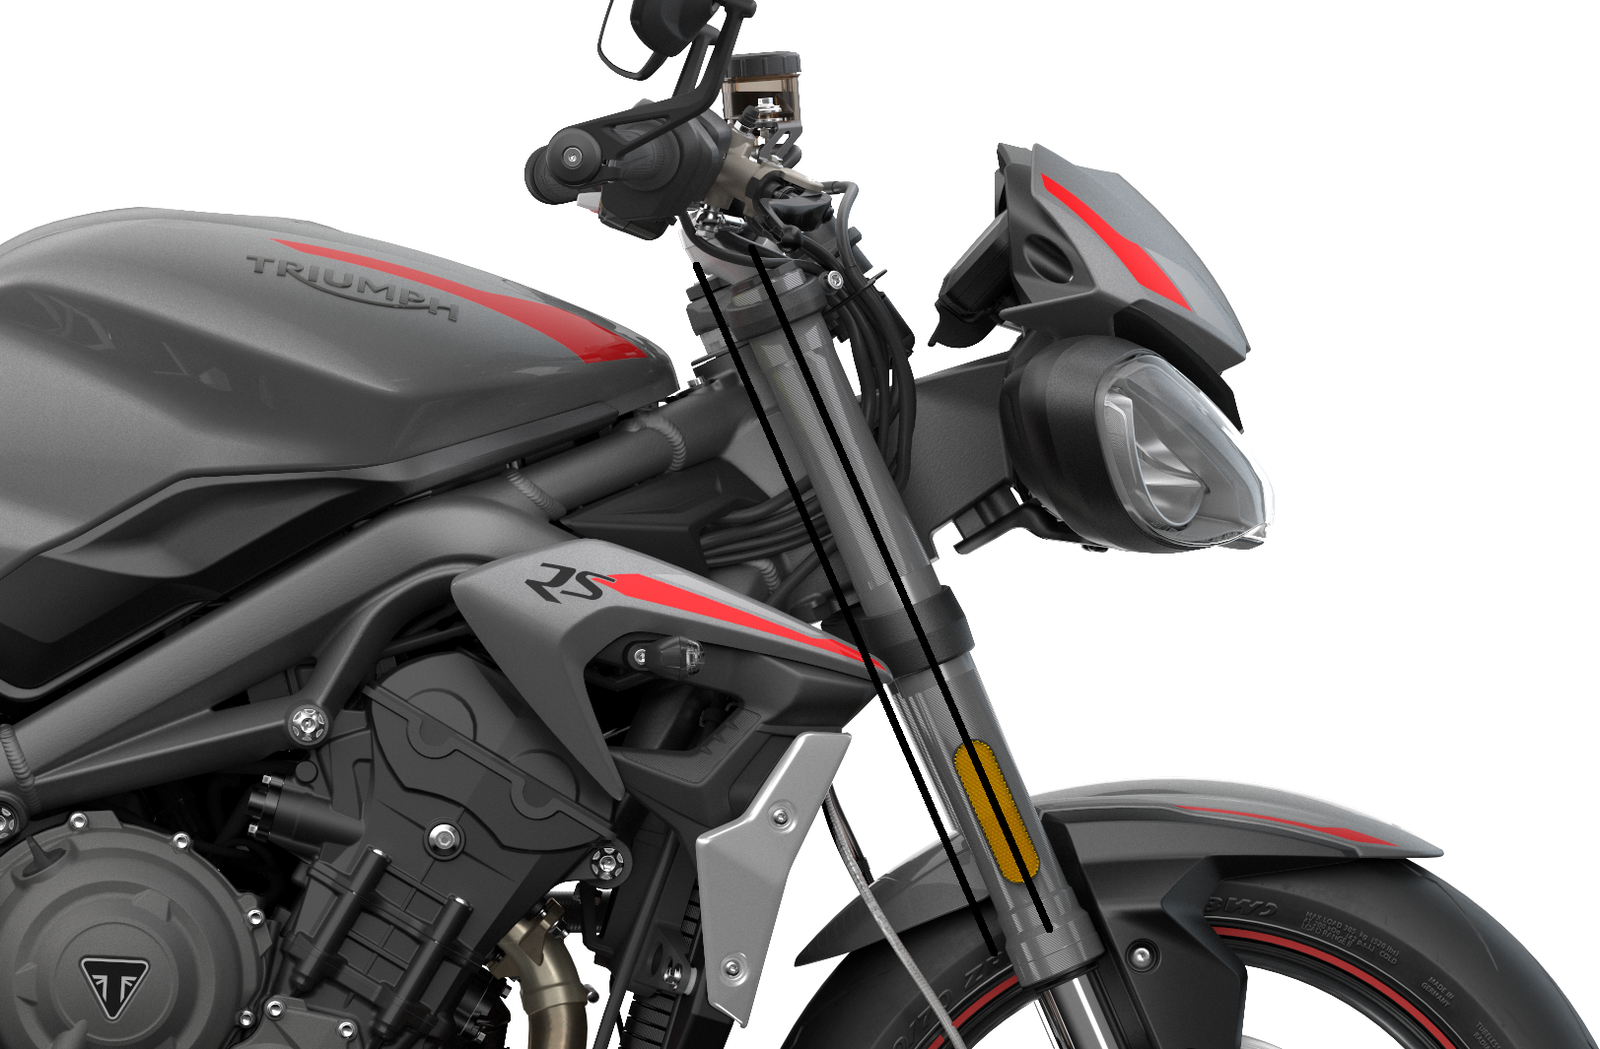
The offset of the bike is the distance between the steering head and the centre line of the front forks. On the image above it is the distance measured between the two parallel black lines that run from the centre of the forks and the centre of the steering head pivot. To change the offset you’d need to physically swap out the yolks on the bike – or adjust the yolk if you’re lucky enough to have a set that allows adjustment.
How do you adjust motorcycle geometry?
Ride height is the most common and easiest ways you can adjust your bike’s geometry. Changing a bike's ride height (either front or back) will affect the trail and rake of the machine. As the rake and trail are altered, so are the handling characteristics of the bike. If you increase the rake angle, the bike will feel more stable – in the way that a long and low cruiser feels stable in the straight line but harder to turn. Reduce the rake angle and the bike will feel less stable but easier to turn.
Less rake angle will create a bike will have more of a propensity to shake its head as you get on the power coming out of corners, or a machine that feels nervous to ride. Any adjustment you make should be approached with caution and taken in small steps.
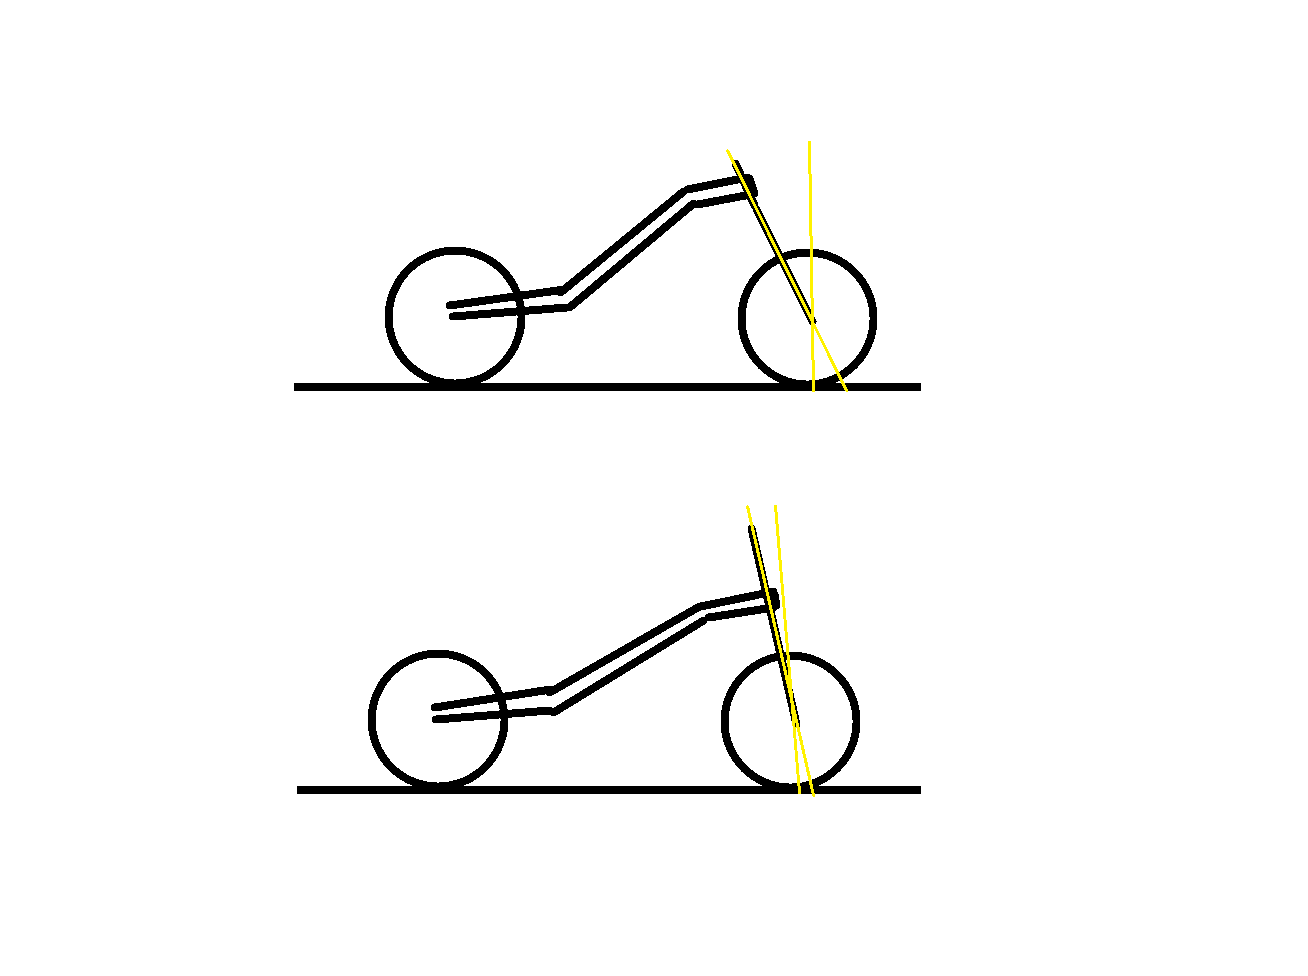
The (very crudely drawn) image above shows two bike chassis, the top as a more conservative set up, the bottom with a more extreme one. As the yolk slides down the forks we can see how the rake and trail are altered.
To increase the trail of your bike – for more stable handling – you can add a larger front tyre/wheel, raise the front ride height, lower the rear ride height, increase the rake angle or by decreasing the offset distance. To decrease the trail of your bike – for faster turning and less stability – you would do the opposite of these steps.
Think about the handling of your bike as a scale with one end being the fastest turning machine on the road, and the other end is the epitome of stability and predictability. When setting up your bike you’re looking to find your place on this scale. Much of where you aim to land will come down to your riding experience. The longer you’ve ridden and the more track riding you’ve done – it’ll probably be at the racier, livelier end of the scale. And for newer riders, a slightly more predictable and stable bike would be more adequate.
The one thing to be mindful of when adjusting the ride height of your bike is the centre of gravity or CoG. You may adjust the ride height and get the rake and trail just how you want them, but in doing so you could completely screw up the bike’s centre of gravity in the process. Sometimes it can be better to adjust the offset to achieve the desired result. Altering offset will still affect the CoG of the bike, but much less than changing the ride height.
