How to prepare for the MOT test
Guarantee your bike will pass it's MOT with Whitham's guide

���
�
If you’re bike’s over three years old, then you’ll be subjected to the annual ordeal of the MOT test. It’s always a pretty worrying time of year, but it needn’t be if you look after your bike and know what to expect. By following these simple steps, not only can you make sure your bike flies through the test, you can be better equipped when buying your next second hand bike.
Step 1
�
Step 1
The most common MOT failures are always the most obvious ones. Start the engine and check that all your lights work properly, including all the ‘idiot’ lights on the dash. Test the brake lights with the indicators on – this way if there’s a faulty earth it’ll be easy to spot. While you’re sitting on the bike make sure that the headlight main beam shines at a horizontal level – dipped should be lower and to the left. Give the horn a toot!
Step 2
�
Step 2
If you’ve fitted a dinky number plate, then dig out the original. If you’ve fitted a ‘tail tidy’ or similar, then you’ll need to make sure that you’ve got a rear reflector – if not it’s an instant fail. Have a look over the bike for any loose nuts and bolts, missing fairing fasteners, corroded brackets and suchlike. Get a torch in all the nooks and crannies to inspect for fluid leaks – even if you don’t find anything that will cause an MOT failure, regular inspection never hurts.
Step 3
�
Step 3
Race exhausts may look and sound mint – but your MOT inspector might not think so unless it carries the BSAU stamp and is approved for road use. Not only that, but in the very near future, bikes will be subject to ever stricter emissions tests as part of the MOT test so, if you’ve removed the catalytic converter, you’d best get it refitted in time for the test. You’ll also need to check the system for leaks. The easiest way is to hold a rag over the end of the pipe – you’ll soon hear if it’s blowing anywhere.
Step 4
�
Step 4
General wear and tear is unavoidable, but spotting it in time before it causes a problem shouldn’t be. Check the condition of the chain and sprockets for wear – if the chain is slack, dry and rattling against the hooked teeth of a worn out sprocket you can expect a tick on the fail sheet. Likewise, you need to have a look at the brake pads to check that there’s at least 1mm of pad material visible, no signs of any fluid leakage from the callipers or master cylinders and that the flexi-hoses aren’t damaged, bulged or perished. Check the rear shock and fork stanchions too for any signs of a fluid leak.
Step 5
�
Step 5
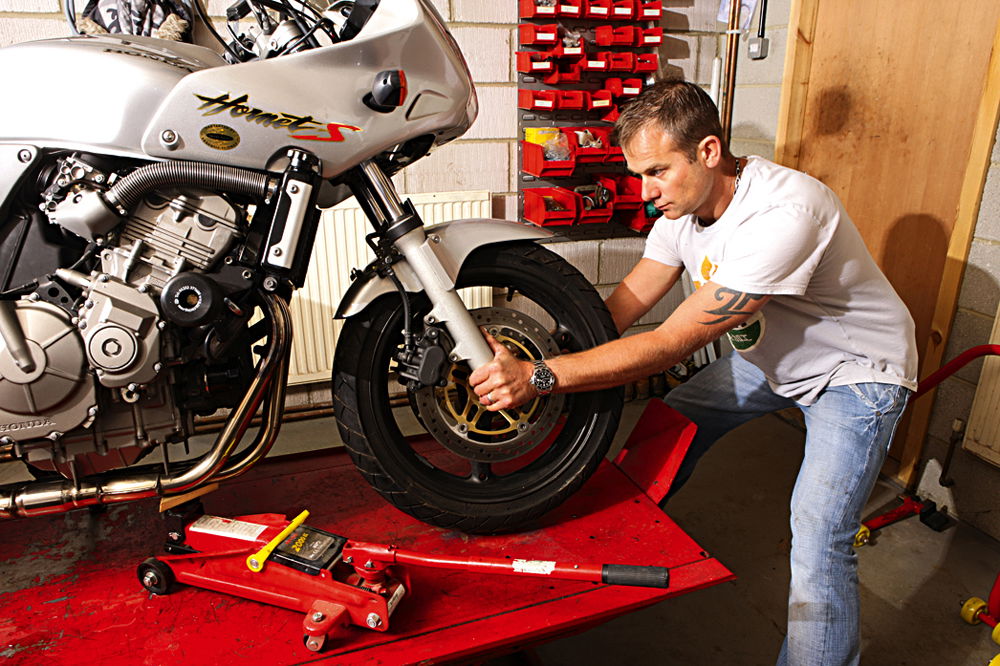
Headrace, wheel and suspension bearing faults account for a huge number of failures. Support the bike under the headers to lift the front wheel off the ground. Grasp the forks and feel for play in the head bearings by pushing and pulling equally on each leg. Turn the wheel lock to lock to feel for roughness in the head bearings. Play in the front wheel bearings can be felt by holding onto a fork leg with one hand and a wheel spoke with the other. Check the brake discs for binding and warping.
Step 6
�
Step 6
Now move the jack towards the rear of the bike or get a mate to hold the bike on the side stand with the wheel off the ground – you need to get the rear wheel off the ground in such a way that it ‘hangs’ on the suspension. Check fore and aft as well as up and down movement to feel for play in the rear suspension linkages and check the rear wheel bearings for any play and roughness.
Check the rear brake pads and have a good look at your wheels and discs checking for any cracks or other damage. Give your tyres the once over for any faults like bulges or tears in the sidewall or tread. Check the tread depth – there needs to be a minimum of 1mm over 80% of the treaded area.
Sponsored By

Britain's No.1 Specialist Tools and Machinery Superstores
When it comes to buying tools and machinery, you need to know you're buying from specialists who know what they're talking about.
Machine Mart eat, sleep and breathe tools and machinery, and are constantly updating their range to give you the very best choice and value for money - all backed by expert advice from their friendly and knowledgeable staff. With superstores nationwide, a dedicated mail order department and a 24 hour website offering quality branded items at fiercely competitive prices, they should be your first choice for quality tools and equipment.

