D.I.Y: Help your carbs breath more easily
Is your carbed bike wheezing like a 60-a-day smoker after a 100m dash? Here's how to make your bike breathe more easily


With more and more bikes now coming with fuel-injection the art of fettling carburretors is gradually being forgotten, so here's a reminder. It's only in the last five years that fuel-injection has really become common on bikes, so if you are looking at buying an older machine the chances are it will have carbs, and they may well need cleaning - especially if the bike has been off the road for a long period of time.
Because it's a fiddly and somewhat time-comsuming task, getting carbs cleaned professionally is expensive, but it isn't actually that hard to do. And virtually no specialist tools are required.
But how do you know if your bike's carbs need a clean? Well for a start, is it running properly? If it keeps cutting out at high revs, stutters, doesn't tick over properly etc, then the chances are it is something to do with the carbs. It could be a bit of dirt, a float set at the wrong height, a blocked jet or an incorrectly set air screw. All simple things to check and fix if necessary. Also if you are fitting a race exhaust to a carbed bike then it will need to be re-jetted to suit the pipe. Again, easy to do.
So where do you start? Well the first thing is to get to the carb or carbs. Strip off the fairing or side panels and put them somewhere safe. Next to come off is the tank; again put it safely away from where you are working and take care disconnecting fuel lines, remembering what went where. Keep a notebook and pen nearby to make any drawings or notes to help you when reassembling. Now you should be able to see the carbs, so get ready for the fiddly part.
First up loosen the jubilee clips that hold the carbs to the inlet manifold and air-box then disconnect all the over-flow pipes and wires that attach the carbs to other things on the bike. Why do carbs have wires going to them? Some have carb heaters, to stop carb-icing in winter, and some have sensors. It may not be necessary to disconnect all the fuel overflow pipes, some are short enough to come away with the carbs; what you are trying to avoid is having to re-route any long tubes.
Carbs clear of connectors? Right, disconnect the throttle cables and now is the tricky part, getting them out. This is always a fiddle because carbs are inevitably placed in a very small, confined space. Once you have taken them out you will learn the technique, but the first time is always a case of trial and error - usually more error. Patience is the key here.
Right, carbs out. The first job is to check the diaphragm, provided your bike has one as there are a few types of carb. A CV (constant velocity) carb is operated by a vacuum lifting the needle while on other carbs such as flat-slide ones the throttle cable physically lifts the needle.
On a bike with CV carbs the first thing to do is check the diaphragm for rips. Take the top of the carb off and carefully pull out the diaphragm. Gently inspect it for rips and replace if it has any. If your bike is running rich or lean you can also adjust the needle height. Simply remove the circlip holding the needle in and move it down a notch for richer and up for leaner. Diaphragm checked, it's time for the jets.
Remove the four cross-head screws that hold the float bowl on. You can mash these up very easily, so be careful and use a tight-fitting screwdriver. Replace them with decent Allen bolts when you put it back together again.
Now you have the jets exposed carefully remove each one and clean it. The best stuff to clean out any jet is air, so blow through them then squirt some carb cleaner through. Clean the whole of the inside of the carb by blowing and squirting cleaner in and take out each jet individually. Have a careful look in the float bowl for dirt, this is a good clue if there is any inside the carb.
Clecking the float height is tricky and different techniques apply for different bikes - your owner's manual should be able to help on this one. If you don't have a manual then the internet often has the answers, or contact your local dealer for help.
All clean and tidy? Good. Now check the air screw, which should be set somewhere between one-and-a-half and two-and-a-half turns out from fully in. Again check your owner's manual or contact a dealer.
All done? Then it's time to put the float bowl back on, replace the cross-head screws and try and get the carb back in again. Remember it came out so must go back in again. This part is always a nightmare so take your time and above all remain calm. Frustration leads to disaster. Don't get annoyed and try to force it in there, be gentle and use some lube or light oil such as WD-40 on the rubbers to help easy the carb into place. Once there re-connect all the electrical clips and fuel lines, re-connect the throttle cables and check that everthing runs smoothly.
Finally replace the tank and bodywork and see if she starts up. Rememebr it'll take a while for the fuel to re-fill the carb. But that's it, congratulations for a job well done.
1 Get all the necessary bodywork/tank/side panels out of the way and put them somewhere safe. Now loosen the jubilee clips that hold the carb to the inlet manifold and airbox
2 Undo and disconnect all the fuel lines and electrical connectors that lead to the carb. Some of the over-flow pipes may be short enough to leave connected
3 Drain the carb using the drain screw then disconnect the throttle cables. If you spill petrol on the floor mop it up straight away, don't have a fag and think about it!
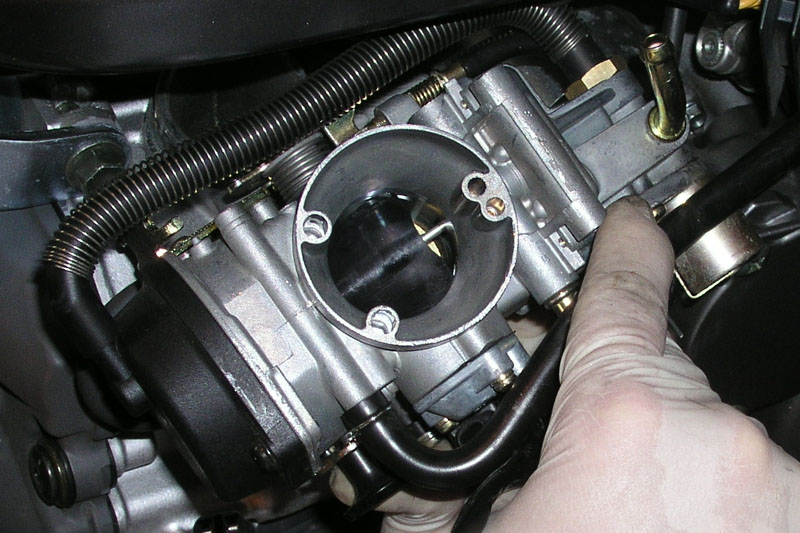
4 With a bit of effort the carb should now come out. This is usually a real fiddle so try pushing back the airbox rubber to gain a bit more room for movement. It went in so it'll come out!
5 Right, now you have a carb. Clean a space on your work top and prepare to attack. First up give the carb a clean all over then check the movement of the slide to see it's not sticky
6 Assuming you have a CV carb undo the screws holding the hard plastic top on and carefully remove the rubber diaphragm. Check for tears in the rubber
7 Turn the carb over and undo the four cross-head screws that hold the float bowl on. Take care, they are usually made of very soft metal and round easily. Clean the float bowl using carb cleaner
8 Check the float level. Your manual will explain exactly how to do this, the technique can vary between bikes. A Vernier gauge is the best tool but often a ruler can be used
9 To adjust the float height carefully bend the metal tab using a screwdriver. Only bend it a little at a time as it can weaken. Be gentle with the floats they can be damaged easily
10 Unscrew the main jet and check it doesn't have any dirt stuck in it. Blow through the jet then give it a squirt of carb cleaner to be sure it's clean
11 Unscrew and remove the primary jet and check it doesn't have any blockages. Again blow through it and give it a good clean with carb cleaner
12 Take the floats off, usually a screw holds them in, and place them somewhere safe. Underneath is the needle valve, give it a good clean
13 Check the air screw is set correctly. It is usually between one and a half and two and a half turns out from fully in. Again look in your manual
14 Put it all back together again and replace those horrible, crap cross-headed screws with decent quality Allen bolts
15 Squirt a bit of light oil, WD-40 is perfect, on the rubbers to help ease the carb back into position. Remember lubrication is a good foundation!
16 And back in she goes. Re-connect all the bits that you pulled off earlier and there you have it, one clean and hopefully perfectly working carb

Jump to our descriptive step by step guide for clean carbs
With more and more bikes now coming with fuel-injection the art of fettling carburretors is gradually being forgotten, so here's a reminder. It's only in the last five years that fuel-injection has really become common on bikes, so if you are looking at buying an older machine the chances are it will have carbs, and they may well need cleaning - especially if the bike has been off the road for a long period of time.
Because it's a fiddly and somewhat time-comsuming task, getting carbs cleaned professionally is expensive, but it isn't actually that hard to do. And virtually no specialist tools are required.
But how do you know if your bike's carbs need a clean? Well for a start, is it running properly? If it keeps cutting out at high revs, stutters, doesn't tick over properly etc, then the chances are it is something to do with the carbs. It could be a bit of dirt, a float set at the wrong height, a blocked jet or an incorrectly set air screw. All simple things to check and fix if necessary. Also if you are fitting a race exhaust to a carbed bike then it will need to be re-jetted to suit the pipe. Again, easy to do.
So where do you start? Well the first thing is to get to the carb or carbs. Strip off the fairing or side panels and put them somewhere safe. Next to come off is the tank; again put it safely away from where you are working and take care disconnecting fuel lines, remembering what went where. Keep a notebook and pen nearby to make any drawings or notes to help you when reassembling. Now you should be able to see the carbs, so get ready for the fiddly part.
First up loosen the jubilee clips that hold the carbs to the inlet manifold and air-box then disconnect all the over-flow pipes and wires that attach the carbs to other things on the bike. Why do carbs have wires going to them? Some have carb heaters, to stop carb-icing in winter, and some have sensors. It may not be necessary to disconnect all the fuel overflow pipes, some are short enough to come away with the carbs; what you are trying to avoid is having to re-route any long tubes.
Carbs clear of connectors? Right, disconnect the throttle cables and now is the tricky part, getting them out. This is always a fiddle because carbs are inevitably placed in a very small, confined space. Once you have taken them out you will learn the technique, but the first time is always a case of trial and error - usually more error. Patience is the key here.
Right, carbs out. The first job is to check the diaphragm, provided your bike has one as there are a few types of carb. A CV (constant velocity) carb is operated by a vacuum lifting the needle while on other carbs such as flat-slide ones the throttle cable physically lifts the needle.
On a bike with CV carbs the first thing to do is check the diaphragm for rips. Take the top of the carb off and carefully pull out the diaphragm. Gently inspect it for rips and replace if it has any. If your bike is running rich or lean you can also adjust the needle height. Simply remove the circlip holding the needle in and move it down a notch for richer and up for leaner. Diaphragm checked, it's time for the jets.
Remove the four cross-head screws that hold the float bowl on. You can mash these up very easily, so be careful and use a tight-fitting screwdriver. Replace them with decent Allen bolts when you put it back together again.
Now you have the jets exposed carefully remove each one and clean it. The best stuff to clean out any jet is air, so blow through them then squirt some carb cleaner through. Clean the whole of the inside of the carb by blowing and squirting cleaner in and take out each jet individually. Have a careful look in the float bowl for dirt, this is a good clue if there is any inside the carb.
Checking the float height is tricky and different techniques apply for different bikes - your owner's manual should be able to help on this one. If you don't have a manual then the internet often has the answers, or contact your local dealer for help.
All clean and tidy? Good. Now check the air screw, which should be set somewhere between one-and-a-half and two-and-a-half turns out from fully in. Again check your owner's manual or contact a dealer.
All done? Then it's time to put the float bowl back on, replace the cross-head screws and try and get the carb back in again. Remember it came out so must go back in again. This part is always a nightmare so take your time and above all remain calm. Frustration leads to disaster. Don't get annoyed and try to force it in there, be gentle and use some lube or light oil such as WD-40 on the rubbers to help easy the carb into place. Once there re-connect all the electrical clips and fuel lines, re-connect the throttle cables and check that everthing runs smoothly.
Finally replace the tank and bodywork and see if she starts up. Rememebr it'll take a while for the fuel to re-fill the carb. But that's it, congratulations for a job well done.
Sponsored By

Britain's No.1 Specialist Tools and Machinery Superstores
When it comes to buying tools and machinery, you need to know you're buying from specialists who know what they're talking about.
Machine Mart eat, sleep and breathe tools and machinery, and are constantly updating their range to give you the very best choice and value for money - all backed by expert advice from their friendly and knowledgeable staff. With superstores nationwide, a dedicated mail order department and a 24 hour website offering quality branded items at fiercely competitive prices, they should be your first choice for quality tools and equipment.


