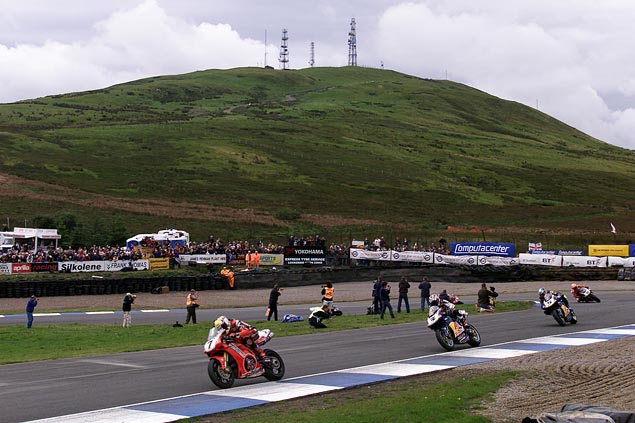
Motorcycle Track Guide: Knockhill

Rip around the bumps and undulations around Scotland's answer to Laguna Seca, Niall Mackenzie shows you how to get Knockhill right

Knockhill may be just over one mile long but it’s variety of corners and elevation changes make every lap an adventure. Over the last two decades Scottish riders have been a major force in the UK, Isle of Man TT and overseas – I firmly believe this would never have happened had they not had Scotland’s only full time motorsport facility to hone their skills when they first started out.

Racing at Laguna Seca in California and Sugo in Japan reminded me a lot of Knockhill but its mixture of quirky downhill twists and heavy braking from high speeds prepared me for many of the challenges over my 20 years of International racing. Being built on a Fife hillside means it tends to rain occasionally but in its defence the majority of BSB meeting held there have been in glorious conditions with the 2009 event being an absolute scorcher.

When it does rain the grip is on a par with the best in the UK and the new drainage can cope with the biggest deluge the Scottish weather gods can muster. I don’t know any racer that doesn’t like Knockhill as mastering this physically demanding circuit always delivers immense satisfaction.

Sector One: Start/Finish to Scotsman

Sector One: Start/Finish to Scotsman

Crossing the start/finish is different to every other circuit in the UK as you will be hanging on tight over a high speed blind crest. You’ll be in fifth gear and, if you’re on modern litre bike or the likes, you’ll need to dab the rear brake, short-shift to sixth or roll back the throttle – failure to do so will more than likely mean you’ll flip backwards and end up skidding down to turn one on your bum. Not very cool.

Don’t for a moment think any of this is scary though, as you’ll easily figure it all out as you build up speed on your opening laps. As you pass under the bridge it’s time to start braking and shifting back to third gear while  getting as close as possible to the left hand side of the track. The ideal peeling-off spot is where the pit lane exit white line meets the edge of the track. I always make sure I have my braking done and the bike settled with time to spare in case I find myself on the grass as the track plummets steeply downhill.

With the big part of your braking complete you should head right to the apex of Seat 1, releasing the brakes as you turn in as you’ll find the camber soon drops away. Once past this point try to use no more than 50% of the track as you drop down the hill. This will let you change direction and sweep nicely through the apex of Seat 2 while helping you pull tight to the left hand side of the track as you approach Scotsman corner.

Sector Two: Scotsman to Carlube

Sector Two: Scotsman to Carlube

On standard road gearing you’ll now want to click back to second before peeling right into Scotsman, once again releasing the front brake early as the camber drops away. Slow-in, fast-out is the safest method here and, providing it is dry, there is no harm in using a big chunk of the painted kerb on the exit.

A quick burst of acceleration as you pick the bike up and change to 3rd gear before heading right to the apex of the downhill Butchers section and onto the trickiest but most important sections of the circuit. The mistake most riders make here is to keep turning right on the approach to the left/right John R. Weir chicane. The most effective way through this section is, after clipping the downhill apex head to the left hand side of the track keeping your body position to the right. You can then straight line the first part of the chicane (over the paint if it’s dry) and you are already in position over this blind rise.

This is shorter, keeps the bike more settled and uses less energy. You should aim for an exit point quite far out of the corner and be mindful to roll the throttle on gradually here as your rear suspension can be topped out as leave this section. Open the throttle early and you’ll go skywards before joining the frogs in the adjoining marsh land. Once safely on your way you’ll use all of 3rd gear and up to 4th if necessary, but then back to 3rd while staying close to the white line and be ready for a nice late entry into the uphill right-hander of Carlube.

Sector Three: Carlube to Start/Finish

Sector Three: Carlube to Start/Finish

Turning in late here is important for two reasons. Firstly the approach is uphill so this adds to your deceleration and secondly this corner tightens up so clipping a late apex will set you up for a good run out.  Coming back to the throttle gently is a must at this one as you’ll be at maximum lean as you rise up onto the back straight. I launched myself here big time in my last year of racing on a GSE Ducati, so don’t be too keen with your right hand. Your track position on the exit of Carlube should allow your bike to be upright and then accelerating as you lean into the long fast left of the Hislop’s back straight.

I love this next section which involves simply following the white line on the left as it curves round to the Real Radio hairpin. This is a fast section, so you’ll most likely be up to fifth gear, but stay to the left as the further out to the right you are the bumpier the track becomes. Your braking prompt is when the track opens and you can pass from here on in but be wary of riders sweeping  back into this right hand hairpin. Exactly like Carlube a late entry point works best as the track rises up mid-corner and will slow you down more than you think. Three quarters of the way round there is a slight dip so you must feel your way over this before feeding in too much throttle. Like Craner at Donington, nearly every top rider has been caught out with this little bugger once. Quirks like these are good, however, as they keep your attention and make you a better rider. Second gear is the safest option for the hairpin and, after using all of the track on the exit, aiming for the middle of the bridge is the best route back to the first corner. This keeps you clear of the pit entry and exit but as the finish straight bends slightly right it will also be the shortest distance.

Call me sad but after 30 years I’ve never tired of riding round Knockhill. It is a fast rollercoaster ride with unique features and first class safety. On most bikes you’ll only use second to fourth gears which is a good thing as there is plenty more to think about besides changing gear. Keep things smooth, brake positively with a slow in/fast out approach and you’ll love the place.

On top of that, no matter who you are you’ll be made welcome by the friendly circuit staff and the views of the Forth Bridges and the Wallace Monument will take your breath away. And then there are the famous Knockhill sheep... Buy me a pint and I'll tell you all those fluffy little fellows...

Read more of Niall Mackenzie's guides to the top UK circuits