

Simple adjustments can make a big difference
MOTORCYCLE SUSPENSION is often perceived as a black art - a phenomenon understood by only a handful of highly skilled gurus, tucked away in small, obscure industrial units somewhere in the back end of beyond.
The truth is modern suspension isn't difficult to get your head around if you can grasp a few basic principles. You don't need to get too involved either - whether you're a back lane scratcher or just enjoy a Sunday afternoon troll around with the missus - making a few simple adjustments to your bike can make all the difference.
But be aware: you can make a total pig's ear of the job unless you know what you're doing. So refrain from making massive adjustments at first, and always keep a record of what you've done.
If you don't have the confidence (and be honest about it, because it took me years to work stuff out and I'm still learning) take your bike to an expert. They'll sort it quickly and professionally for not a huge amount of money.
Why bother?
The benefits to improving your bike's handling are reduced rider fatigue, increased comfort and greater control, as well as making your overall ride more enjoyable.
In simple terms
Your bike suspension is designed primarily to absorb the imperfections in the road and in doing so ensure both tyres keep contact with the tarmac at all times.
How does it all work?
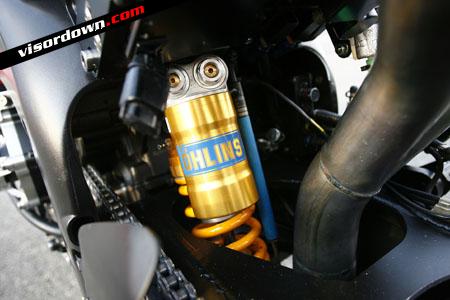
The majority of motorcycle suspension is based around a spring, which compresses and extends when a load is exerted or released. The rate of movement is tempered by dampers, which stop the spring from bouncing like a yoyo.
These dampers are much like an oil-filled bike pumps. The rate the dampers compress and extend depends on the size of the hole the oil is being forced through and the thickness of the oil:
thick oil + small hole = lots of damping force and vice versa.
On modern bikes, this damping force can be increased or decreased by using the compression and rebound adjusters, which work by helping or hindering the flow of oil through the damper.
Make sense?
Where to start
It's worth checking a few basics before you start touching your bike's suspension. There's no point going any further unless these are right:
Tyre condition and pressure
Chain tension and alignment
Head bearings
Rear linkage condition
It's also advisable to check all the suspension settings are equal - i.e. that one rebound damper on the fork top isn't wound to maximum and the other to minimum. If you're unsure (if you've bought a secondhand bike) then return the settings to standard. Your handbook or dealer should be able to show you how.
What sort of adjustment have I got?
Preload:
Preload, especially rear, is probably the most commonly used suspension adjustment on a road bike. It's used to compress the springs, independently of any load they're subjected to by the bike. Adding more preload means the forks or shock will support a greater load for less travel, and reducing preload means they will compress more for a given load.
Ideally, the suspension should 'it' so there's 2/3rds travel for compression and 1/3rd for extension. So imagine your bike with you, your partner and all your kit on board - the springs will compressed and the bike sat too low, hence the need for preload - to keep the spring working in its optimum area.
It's normally adjusted with a spanner on the top of the fork leg, and on shocks it is normally adjusted with a C-spanner found in the toolkit.
When should I adjust it?
When carrying a hefty pillion lots of luggage or when the suspension's sat too low, or too high in the stroke.
Compression damping:
Is used to control the damping force as the suspension compresses. Adding more makes it harder to compress the shocks or forks and vice versa. On forks, the compression adjustment can be found down near the wheel. On rear shocks, the compress adjustment is normally at the seat end of the shock, or on the remote reservoir.
When should I adjust it?
If the forks dive hard under braking. Be careful not to dial-in too much as the front end will become too stiff, causing the tyre to skip over bumps when braking. Increase the rear compression if the bike's bottoming out over bumps (can be helped with added preload too).
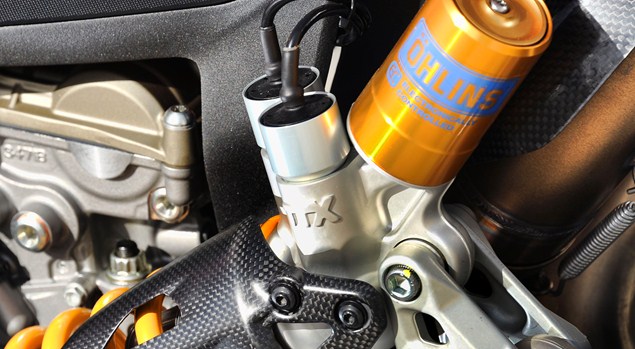
Rebound damping: is an adjustment used to control the amount of damping force as the suspension extends. Adding more means the shock or forks take longer to extend after they're compressed. On forks, rebound adjustment is at the top of the fork leg and is normally adjusted with a flat screwdriver. On shocks, rebound is often found at the bottom, near the suspension linkages.
When should I adjust it?
When the forks or rear shock bounce excessively over bumps. In extreme cases, too much rebound damping can cause the front end to wash out when cornering over bumpy surfaces as the suspension is now too slow to react, causing the front wheel to lose contact with the tarmac.
Sag:
Sag is the amount of suspension travel used to support the bike's static load. Imagine standing up as straight and measuring your height. Now imagine doing the same thing but this time holding your bike above your head. Chances are your knees are going to bend a little bit under the load, so you won't be quite as tall as you were. That's sag.
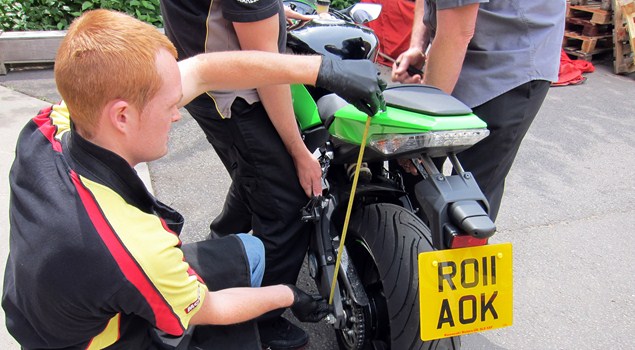
To measure the bike's sag, you need to lift all the weight off the suspension and measure how long the forks are. Then you take the same measurement when the bike is supporting its own weight. This will give you a front sag measurement.
Of course it's hard to measure the shock length, so we generally just measure vertically up from the rear wheel spindle to a point on the rear seat unit. This will give you a rear sag figure.
Laden sag is the same measurement, but this time, the rider should be sat on the bike too.
What if I've no sag?
Under heavy braking from high speed the rear suspension won't extend, causing the back wheel to skip across the floor - so that a slight touch on the rear brake could cause it to lock up and slide sideways. At the front it means the suspension won't be able to extend when the front wheel encounters a dip, hence losing contact with the road surface.
Suit yourself
Be honest about how you ride. There's no point setting your bike up for track use if most of your riding is touring.
Other stuff
If the sag is correctly set, but you only seem to be using half the available travel, then think about fitting softer springs. These will use more travel, which means the bike's attitude when braking is better set to help you turn it into corners. It also means you'll get a better ride quality as the suspension will be softer.
If the sag is correctly set but you've used all the travel, and possibly felt the forks bottom out, you should consider fitting stiffer springs. These will improve the feel of the bike both in turns and exiting bends. Ride quality will also improve as the bike won't be bottoming out. Check this by fitting a tie-wrap to one of the frok stanchions to check how much travel's being used.
The damping adjustment on standard suspension units is generally limited for safety reasons. If you want to improve things, consider fitting new internals, and having the units re-valved, which will give a wider range of adjustment.
Remember to think about problems thoroughly as there can be several ways of solving the same problem. Choosing the wrong one usually creates even greater handling flaws.
For instance, if the steering wobbles under hard acceleration it's generally because there isn't enough weight on it. So you might add some rear compression damping and add some front rebound damping to hold the bike more nose down.
However, too much steering damping can also cause the same problem -- so check that too. When you do make damping changes make small ones at a time and always make a note of what you've done.
The Expert says:
Darren Wnukoski runs MCT Suspension in Stowmarket. The company are specialists in motorcycle suspension. They've been in business for over 10 years and provide a valuable service to road and track riders throughout the country.
We asked Darren what are the most common faults he sees when people 'have a go' at setting up their bike themselves.
"Even experienced racers seem to struggle measuring sag, so it's likely 10 different people will all come up with different measurements - even on the same bike.
"People should write down the settings they are on before
they start carefully for something to fall back on. A well-known performance bike magazine did an article about set-up a while ago and it got us a boatload of work putting some of the readers' bikes right afterwards.
"It's important to remember if you change something and the bike feels better it doesn't mean it's the correct adjustment.
A classic case is the early Honda SP-1. It felt harsh and bumpy and a lot of customers complained of the hard ride - many thought the fork springs and damping were too hard.
The truth was the springs were way too soft - which meant it was bottoming out and feeling hard. Stiffer springs sorted the job.
"The most common mistakes I see are:
1. Not understanding the problem they are trying to cure.
2. Not having a benchmark of what correct is.
3. Inconsistent measuring of static sag.
4. Knackered adjusters from people using incorrect/cheap tools
Don't let anyone touch your suspension unless they're competent
Darren's Do's and Dont's
Do:
Make sure you know the oil level in the forks are correct if they are looking to use all the travel.
Get a free consultation at any suspension centre.
Don't:
Let any mates anywhere near your pride and joy's suspension. Just because they ride quick does not mean they're the next Jerry Burgess...
The Golden Rule
If in doubt then leave it to the experts.
Useful links:
MOTORCYCLE SUSPENSION is often perceived as a black art - a phenomenon understood by only a handful of highly skilled gurus, tucked away in small, obscure industrial units somewhere in the back end of beyond.
The truth is modern suspension isn't difficult to get your head around if you can grasp a few basic principles. You don't need to get too involved either - whether you're a back lane scratcher or just enjoy a Sunday afternoon troll around with the missus - making a few simple adjustments to your bike can make all the difference.
But be aware: you can make a total pig's ear of the job unless you know what you're doing. So refrain from making massive adjustments at first, and always keep a record of what you've done.
If you don't have the confidence (and be honest about it, because it took me years to work stuff out and I'm still learning) take your bike to an expert. They'll sort it quickly and professionally for not a huge amount of money.
Article originally written July 2007 - Updated July 2013
Why bother?
The benefits to improving your bike's handling are reduced rider fatigue, increased comfort and greater control, as well as making your overall ride more enjoyable.
In simple terms
Your bike suspension is designed primarily to absorb the imperfections in the road and in doing so ensure both tyres keep contact with the tarmac at all times.
How does it all work?
The majority of motorcycle suspension is based around a spring, which compresses and extends when a load is exerted or released. The rate of movement is tempered by dampers, which stop the spring from bouncing like a yoyo.
These dampers are much like an oil-filled bike pumps. The rate the dampers compress and extend depends on the size of the hole the oil is being forced through and the thickness of the oil:
thick oil + small hole = lots of damping force and vice versa.
On modern bikes, this damping force can be increased or decreased by using the compression and rebound adjusters, which work by helping or hindering the flow of oil through the damper.
Make sense?
��
MOTORCYCLE SUSPENSION is often perceived as a black art - a phenomenon understood by only a handful of highly skilled gurus, tucked away in small, obscure industrial units somewhere in the back end of beyond.
The truth is modern suspension isn't difficult to get your head around if you can grasp a few basic principles. You don't need to get too involved either - whether you're a back lane scratcher or just enjoy a Sunday afternoon troll around with the missus - making a few simple adjustments to your bike can make all the difference.
But be aware: you can make a total pig's ear of the job unless you know what you're doing. So refrain from making massive adjustments at first, and always keep a record of what you've done.
If you don't have the confidence (and be honest about it, because it took me years to work stuff out and I'm still learning) take your bike to an expert. They'll sort it quickly and professionally for not a huge amount of money.
Article originally written July 2007 - Updated in July 2013
Why bother?
The benefits to improving your bike's handling are reduced rider fatigue, increased comfort and greater control, as well as making your overall ride more enjoyable.
In simple terms
Your bike suspension is designed primarily to absorb the imperfections in the road and in doing so ensure both tyres keep contact with the tarmac at all times.
How does it all work?
The majority of motorcycle suspension is based around a spring, which compresses and extends when a load is exerted or released. The rate of movement is tempered by dampers, which stop the spring from bouncing like a yoyo.
These dampers are much like an oil-filled bike pumps. The rate the dampers compress and extend depends on the size of the hole the oil is being forced through and the thickness of the oil:
Thick oil + small hole = lots of damping force and vice versa.
On modern bikes, this damping force can be increased or decreased by using the compression and rebound adjusters, which work by helping or hindering the flow of oil through the damper.
Make sense?
��
It's worth checking a few basics before you start touching your bike's suspension. There's no point going any further unless the following are right
- Tyre condition and pressure
- Chain tension and alignment
- Head bearings
- Rear linkage condition
It's also advisable to check all the suspension settings are equal - i.e. that one rebound damper on the fork top isn't wound to maximum and the other to minimum. If you're unsure (if you've bought a secondhand bike) then return the settings to standard. Your handbook or dealer should be able to show you how.
What sort of adjustment have I got?
Preload
Preload, especially rear, is probably the most commonly used suspension adjustment on a road bike. It's used to compress the springs, independently of any load they're subjected to by the bike. Adding more preload means the forks or shock will support a greater load for less travel, and reducing preload means they will compress more for a given load.
Ideally, the suspension should 'it' so there's 2/3rds travel for compression and 1/3rd for extension. So imagine your bike with you, your partner and all your kit on board - the springs will compressed and the bike sat too low, hence the need for preload - to keep the spring working in its optimum area.
It's normally adjusted with a spanner on the top of the fork leg, and on shocks it is normally adjusted with a C-spanner found in the toolkit.
When should I adjust it? When carrying a hefty pillion lots of luggage or when the suspension's sat too low, or too high in the stroke.
Compression damping
Is used to control the damping force as the suspension compresses. Adding more makes it harder to compress the shocks or forks and vice versa. On forks, the compression adjustment can be found down near the wheel. On rear shocks, the compress adjustment is normally at the seat end of the shock, or on the remote reservoir.
When should I adjust it?
If the forks dive hard under braking. Be careful not to dial-in too much as the front end will become too stiff, causing the tyre to skip over bumps when braking. Increase the rear compression if the bike's bottoming out over bumps (can be helped with added preload too).
Rebound damping: is an adjustment used to control the amount of damping force as the suspension extends. Adding more means the shock or forks take longer to extend after they're compressed. On forks, rebound adjustment is at the top of the fork leg and is normally adjusted with a flat screwdriver. On shocks, rebound is often found at the bottom, near the suspension linkages.
When should I adjust it? When the forks or rear shock bounce excessively over bumps. In extreme cases, too much rebound damping can cause the front end to wash out when cornering over bumpy surfaces as the suspension is now too slow to react, causing the front wheel to lose contact with the tarmac.
Sag
Sag is the amount of suspension travel used to support the bike's static load. Imagine standing up as straight and measuring your height. Now imagine doing the same thing but this time holding your bike above your head. Chances are your knees are going to bend a little bit under the load, so you won't be quite as tall as you were. That's sag.
To measure the bike's sag, you need to lift all the weight off the suspension and measure how long the forks are. Then you take the same measurement when the bike is supporting its own weight. This will give you a front sag measurement.
Of course it's hard to measure the shock length, so we generally just measure vertically up from the rear wheel spindle to a point on the rear seat unit. This will give you a rear sag figure.
Laden sag is the same measurement, but this time, the rider should be sat on the bike too.
What if I've no sag? Under heavy braking from high speed the rear suspension won't extend, causing the back wheel to skip across the floor - so that a slight touch on the rear brake could cause it to lock up and slide sideways. At the front it means the suspension won't be able to extend when the front wheel encounters a dip, hence losing contact with the road surface.
Suit yourself
Be honest about how you ride. There's no point setting your bike up for track use if most of your riding is touring.
��
It's worth checking a few basics before you start touching your bike's suspension. There's no point going any further unless these are right:
- Tyre condition and pressure
- Chain tension and alignment
- Head bearings
- Rear linkage condition
It's also advisable to check all the suspension settings are equal - i.e. that one rebound damper on the fork top isn't wound to maximum and the other to minimum. If you're unsure (if you've bought a secondhand bike) then return the settings to standard. Your handbook or dealer should be able to show you how.
What sort of adjustment have I got?
Preload
Preload, especially rear, is probably the most commonly used suspension adjustment on a road bike. It's used to compress the springs, independently of any load they're subjected to by the bike. Adding more preload means the forks or shock will support a greater load for less travel, and reducing preload means they will compress more for a given load.
Ideally, the suspension should 'it' so there's 2/3rds travel for compression and 1/3rd for extension. So imagine your bike with you, your partner and all your kit on board - the springs will compressed and the bike sat too low, hence the need for preload - to keep the spring working in its optimum area.
It's normally adjusted with a spanner on the top of the fork leg, and on shocks it is normally adjusted with a C-spanner found in the toolkit.
When should I adjust it?
When carrying a hefty pillion lots of luggage or when the suspension's sat too low, or too high in the stroke.
Compression damping
Is used to control the damping force as the suspension compresses. Adding more makes it harder to compress the shocks or forks and vice versa. On forks, the compression adjustment can be found down near the wheel. On rear shocks, the compress adjustment is normally at the seat end of the shock, or on the remote reservoir.
When should I adjust it?
If the forks dive hard under braking. Be careful not to dial-in too much as the front end will become too stiff, causing the tyre to skip over bumps when braking. Increase the rear compression if the bike's bottoming out over bumps (can be helped with added preload too).
Rebound damping
An adjustment used to control the amount of damping force as the suspension extends. Adding more means the shock or forks take longer to extend after they're compressed. On forks, rebound adjustment is at the top of the fork leg and is normally adjusted with a flat screwdriver. On shocks, rebound is often found at the bottom, near the suspension linkages.
When should I adjust it?
When the forks or rear shock bounce excessively over bumps. In extreme cases, too much rebound damping can cause the front end to wash out when cornering over bumpy surfaces as the suspension is now too slow to react, causing the front wheel to lose contact with the tarmac.
Sag
Sag is the amount of suspension travel used to support the bike's static load. Imagine standing up as straight and measuring your height. Now imagine doing the same thing but this time holding your bike above your head. Chances are your knees are going to bend a little bit under the load, so you won't be quite as tall as you were. That's sag.
To measure the bike's sag, you need to lift all the weight off the suspension and measure how long the forks are. Then you take the same measurement when the bike is supporting its own weight. This will give you a front sag measurement.
Of course it's hard to measure the shock length, so we generally just measure vertically up from the rear wheel spindle to a point on the rear seat unit. This will give you a rear sag figure.
Laden sag is the same measurement, but this time, the rider should be sat on the bike too.
��
��
What if I've no sag?
Under heavy braking from high speed the rear suspension won't extend, causing the back wheel to skip across the floor - so that a slight touch on the rear brake could cause it to lock up and slide sideways. At the front it means the suspension won't be able to extend when the front wheel encounters a dip, hence losing contact with the road surface.
Suit yourself
Be honest about how you ride. There's no point setting your bike up for track use if most of your riding is touring.
Other stuff
If the sag is correctly set, but you only seem to be using half the available travel, then think about fitting softer springs. These will use more travel, which means the bike's attitude when braking is better set to help you turn it into corners. It also means you'll get a better ride quality as the suspension will be softer.
If the sag is correctly set but you've used all the travel, and possibly felt the forks bottom out, you should consider fitting stiffer springs. These will improve the feel of the bike both in turns and exiting bends. Ride quality will also improve as the bike won't be bottoming out. Check this by fitting a tie-wrap to one of the frok stanchions to check how much travel's being used.
The damping adjustment on standard suspension units is generally limited for safety reasons. If you want to improve things, consider fitting new internals, and having the units re-valved, which will give a wider range of adjustment.
Remember to think about problems thoroughly as there can be several ways of solving the same problem. Choosing the wrong one usually creates even greater handling flaws.
For instance, if the steering wobbles under hard acceleration it's generally because there isn't enough weight on it. So you might add some rear compression damping and add some front rebound damping to hold the bike more nose down.
However, too much steering damping can also cause the same problem - so check that too. When you do make damping changes make small ones at a time and always make a note of what you've done.
��

Suspension know how: The Expert
Darren Wnukoski runs MCT Suspension in Stowmarket. The company are specialists in motorcycle suspension. They've been in business for over 10 years and provide a valuable service to road and track riders throughout the country.
We asked Darren what are the most common faults he sees when people 'have a go' at setting up their bike themselves.
"Even experienced racers seem to struggle measuring sag, so it's likely 10 different people will all come up with different measurements - even on the same bike.
"People should write down the settings they are on before
they start carefully for something to fall back on. A well-known performance bike magazine did an article about set-up a while ago and it got us a boatload of work putting some of the readers' bikes right afterwards.
"It's important to remember if you change something and the bike feels better it doesn't mean it's the correct adjustment.
A classic case is the early Honda SP-1. It felt harsh and bumpy and a lot of customers complained of the hard ride - many thought the fork springs and damping were too hard.
The truth was the springs were way too soft - which meant it was bottoming out and feeling hard. Stiffer springs sorted the job.
The most common mistakes I see are:
- Not understanding the problem they are trying to cure.
- Not having a benchmark of what correct is.
- Inconsistent measuring of static sag.
- Knackered adjusters from people using incorrect/cheap tools
Darren's Do's and Dont's
Do
- Make sure you know the oil level in the forks are correct if they are looking to use all the travel.
- Get a free consultation at any suspension centre.
Don't
- Let any mates anywhere near your pride and joy's suspension. Just because they ride quick does not mean they're the next Jerry Burgess...
The Golden Rule
If in doubt then leave it to the experts.
Related article: Motorcycle suspension tuning setup
��
The Expert says
Darren Wnukoski runs MCT Suspension in Stowmarket. The company are specialists in motorcycle suspension. They've been in business for over 10 years and provide a valuable service to road and track riders throughout the country.
We asked Darren what are the most common faults he sees when people 'have a go' at setting up their bike themselves.
"Even experienced racers seem to struggle measuring sag, so it's likely 10 different people will all come up with different measurements - even on the same bike.
"People should write down the settings they are on before they start carefully for something to fall back on. A well-known performance bike magazine did an article about set-up a while ago and it got us a boatload of work putting some of the readers' bikes right afterwards.
"It's important to remember if you change something and the bike feels better it doesn't mean it's the correct adjustment.
A classic case is the early Honda SP-1. It felt harsh and bumpy and a lot of customers complained of the hard ride - many thought the fork springs and damping were too hard.
The truth was the springs were way too soft - which meant it was bottoming out and feeling hard. Stiffer springs sorted the job.
The most common mistakes I see are
- Not understanding the problem they are trying to cure.
- Not having a benchmark of what correct is.
- Inconsistent measuring of static sag.
- Knackered adjusters from people using incorrect/cheap tools
Darren's Do's and Dont's
Do's
- Make sure you know the oil level in the forks are correct if they are looking to use all the travel.
- Get a free consultation at any suspension centre.
Don't
- Let any mates anywhere near your pride and joy's suspension. Just because they ride quick does not mean they're the next Jerry Burgess...
The Golden Rule
If in doubt then leave it to the experts.
��